Want to learn how to roast your own green coffee beans at home? This guide has got you covered.
When it comes to coffee, most people buy one of the following:
- Coffee beans
- Ground coffee
From here, they can quickly make cups of coffee at home with minimal fuss or hassle. For example, it typically only takes a few minutes to grind coffee beans. And with ground coffee, the work has already been done for you.
However, a growing number of coffeeholics around the world have started to roast their own coffee beans. Some do it for fun, while others do it as a serious hobby. Interestingly, it’s even possible to save money by roasting your own coffee beans, which you can learn more about later.
Whatever your specific reason is for wanting to roast your own green coffee beans, you’ve come to the right place. Through this simple, easy-to-follow guide, you can learn how to roast your own coffee beans at home.
Ready to learn? Grab a cup of coffee, sit back, relax, and read ahead!
Step 1: Source your Green Coffee Beans
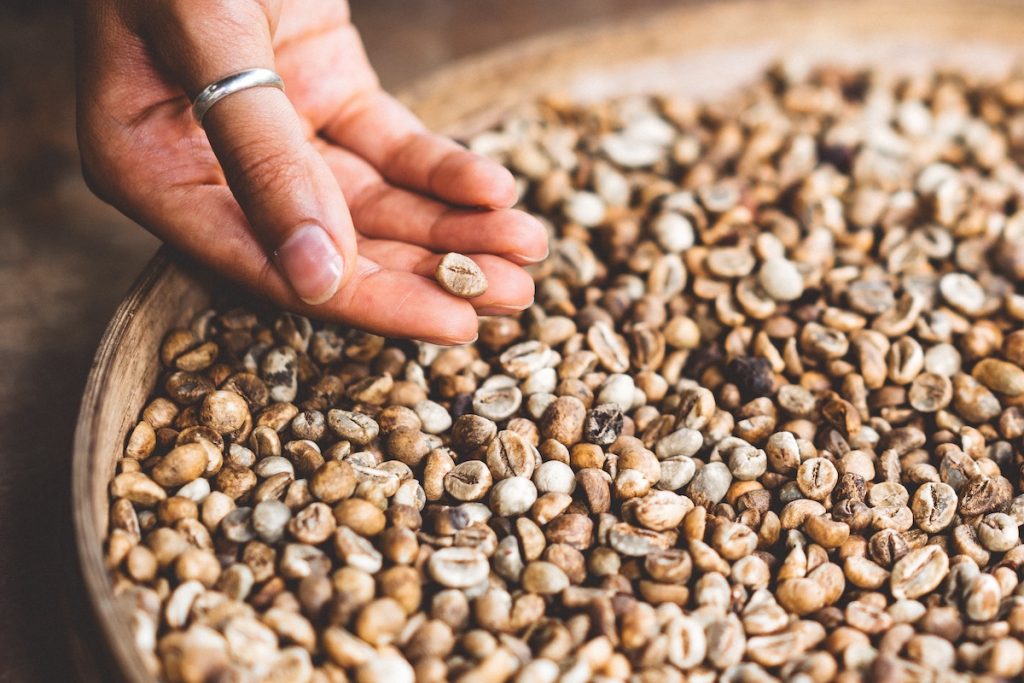
Before you dive into the action, the first thing you need to do is source your green coffee beans for roasting.
Where’s the best place to get green coffee beans from? Simple: use green coffee importers. This way, you can get your hands on the quantity of green coffee beans that you need. For example, you might order x2 60 KG bags.
Pro tip: Choose green coffee beans that are the same size and color.
In case you didn’t know, green coffee beans are raw seeds that have been separated from coffee cherries. These coffee beans contain all of the future coffee’s taste and potential. The way you bring this potential to life is via the roasting process.
The price of green coffee beans varies depending on the supplier you purchase. However, the good news is that green coffee beans are (in most cases) very affordable. This is self-explanatory, as unroasted coffee beans haven’t been through the roasting process, something that requires both time and effort. As a result, you can potentially save yourself a ton of money by purchasing green coffee beans and taking the roasting process into your own hands.
Once you’ve purchased raw coffee beans and they’ve successfully been delivered to your home, you’ll be ready to progress into step 2.
Step 2: Decide Whether You Want a Light, Medium, or Dark Roast
If you have a history of drinking coffee, you’ll already know your preference.
Lighter roasts are less ‘roasty’ but contain more natural flavors and aromas, whereas darker roasts have less inherent flavors but are stronger. Typically, people will go for medium so that they have the perfect balance.
Step 3: Choose your Preferred Roasting Method
Next, you’re going to want to choose your preferred roasting option. Everyone is different when it comes to this – and sometimes, it’s a case of trying multiple methods until you find the one that you’re most comfortable with.
Here are your options:
- Pan roasting
- Oven roasting
The average person will do pan roasting, so we’ll discuss this method first.
Pan Roasting
Pan roasting is arguably the most fun method that you can use. It’s also extremely fast, which is a nice added bonus.
- First, start by grabbing your pan and turning on your exhaust fan. It’s also recommended that you open your windows to maximize ventilation.
- Place your pan on medium heat. Anywhere between 200°C and 240 °C should do the job
- Add your beans to the pan in a nice and smooth layer. This will make stirring your beans very easy
- Start stirring with a wooden spoon and keep on going for around 5 minutes. At this point, you should start to hear some crackling. This indicates that your beans are now at a light roast (if you want a light roast, stop now)
- Keep on stirring until the 7-minute mark. The beans should crack again, which indicates a medium roast (again, stop here if you want a medium roast)
- If you want a dark roast, continue stirring for a few minutes longer
- Turn off the heat and put your coffee beans into a colander to stir and shake. It’ll be hot, so make sure you’re wearing mitten gloves
- Add your coffee beans to an air-tight container
- Leave your coffee beans in the air-tight container at room temperature for anywhere between 1 and 7 days so that the flavors can open up and nurture
Pretty simple, right? The more you practice, the easier this will become.
Oven Roasting
Next, oven roasting.
- Open your windows and pre-heat the oven to 500°f
- Spread your green coffee beans over a tray. Make sure it’s a smooth layer – don’t stack your coffee beans on top of each other! The best tray to use is a perforated tray
- Place your beans onto the middle shelf of the oven. This is important
- Just like with the pan roasting process, you’re going to want to listen for the first crack after around 5 minutes. Again, your beans are now lightly roasted, and you can stop at this point if you like
- If not, continue until you hear a 2nd crack. Now, you’re at a medium roast. This is when most people remove the beans from the oven and transfer them to a colander to shake and stir, followed by an air-tight plastic container for storage
- Leave your coffee beans for around 24 hours so that they can cool down and ventilate.
- Again, you can store your coffee beans for up to 7 days for optimal taste
As you can see, oven roasting requires less manual work, which might appeal to you more than pan roasting.
Step 4: Grind Your Coffee Beans
Once you’ve left your coffee beans for the desired amount of time, you can then grind them. Some people do this manually, while others use a coffee-grinding machine.
Step 5: Make a Cup of Coffee and Enjoy!
The final step is to make the cup of coffee itself. You’ll no doubt already know how to do this, so go ahead and make your first cup of coffee from the coffee beans that you’ve roasted yourself!
Over time, you’ll become better at the process. You’ll even discover the perfect temperatures for roasting as well as the roasting time lengths that work best for you.


